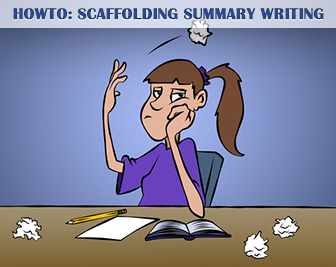
Writing a summary is a great activity that benefits both students and teachers alike.
For the student, it offers them a chance to synthesize what they just read and sort out the ideas in their own words. For the teacher, it is a great way to assess the student’s comprehension of the material.
Although writing a summary can be quite a rigorous activity for English language learners, that should not discourage teachers from doing summary writing in their classrooms. Like any rigorous activity, with the right scaffolding, students can rise to the level of the activity and come out stronger.
There are many ways a teacher could scaffold writing summary. The process I share below, done in its entirety, touches on all of the four language skills: listening, reading, speaking and writing. Although the activities are very effective when done in the sequence below, they are very effective individually. When deciding which activities to use, the teacher must look at factors such as the level of the class and the class time constraints. It is best to do this sequence of a series of days.
HOWTO: Scaffolding Summary Writing
-
1
Interactive Read-Aloud
The first step to writing a summary is to read the material to be summarized. There are many ways you could do this such as reading individually, reading in partners, or reading as a group.
For the most support, I recommend doing an interactive read-aloud first. This is where the teacher reads the material to the class using different voices, gestures, and facial expressions to facilitate the understanding of meaning of a story. During this process, it is recommended that the teacher stops at key moments throughout the story to offer explanations and/or to check for students’ comprehension.
Following the read-aloud, the students should read the material in pairs or individually to solidify their understanding of the material.
-
2
Graphic Organizers
Once you have read the material, it helps to organize the ideas into a graphic organizer. This can help students get their ideas on to paper in a clear, organized format. It is recommended to have the students do this in a small group or in pairs so they have the support of others. If you don’t have one already, the internet is filled with free graphic organizers that you can print and use in your classroom!
-
3
Language Experience
Language Experience is a great way to get the students talking while also helping them construct a summary with the support of their classmates and the teacher. The final product is a great example to the students of what a summary should look like. It is also all student created so the students will take pride in what they have accomplished together and will have the confidence to do it individually in the future.
Here is how to do a language experience activity.- Student Contribution: Have the students give you a sentence for the summary and write it on the board. You could ask for volunteers or call on individuals. During the activity, you may want them to have their graphic organizers out for extra support if needed. Go through each student in the class, having each student add a sentence, until a full summary is written on the board.
- Make corrections: It is inevitable that students will make mistakes as they relate the ideas to you so you may need to model standard English after the student gives you a sentence. There are many different schools of thought on error correction so how you do this will depend on your teaching style.
It is important that the teacher proceeds with care whenever doing error correction as some students may become self-conscious and not want to contribute in the future. We want this to be a very positive experience for the students so they will want to always contribute in the future. There are many ways to do error correction. One way to approach it is to ask the student “May I write it this way?” followed by the model of standard English. - Read the summary: You should encourage your students to read along with you as you point to the words on the board. You may later choose to have them read it in partners after it is read as a group.
-
4
Write the Summary
You have read the material, you have organized ideas using graphic organizers, and you have composed a group summary that acts as a great example for the students. It is now time to write the summary. How much scaffolding you add at this point will depend on you and your students. Here are some options.
- Cloze: Take the language experience summary that you created and turn it into a cloze activity. You can remove every five words, remove parts of sentences, or remove only important words that you want to focus on. This can be done with or without a word bank.
- Partner Summary: If you do not think students are quite ready to write a summary by themselves, you could put them in pairs and ask each pair to turn in a summary.
- Pictures: Sometimes students are able to write on their own but they need a little guidance. You could give the students a sequence of pictures that follow the storyline. This can help them stay on track and offer support if they run into a problem.
- Individual Summary: If the students are ready, give them a blank piece of paper and let them run with it. Although as teachers we find giving summary tasks as daunting as our students find writing them, sometimes we just have to let go. Often, the students surprise themselves and us with what they produce.
-
5
Share
This is the most important step of all. You went through all the steps scaffolding the summary writing process and the students produced great summaries that deserved to be shared. You can have each student read their summary to the class or read it to their partner. If you want to allow comments after reading, it is recommended to only comment on content at this point. If you want to do a peer-editing step before sharing, that would be the time to comment on grammar and syntax.
Sharing should not stop with members of the class; we need to share this accomplishment with other teachers, parents, and the community. Post your summaries around your classroom or your school that is visible for anyone who drops by for a visit.
Writing a summary can sound scary to both teachers and students, but if you take the process in small steps, students will produce great summaries in no time!
This is a guest post by Keith Graham. Want to write a guest post? Contact us!
P.S. If you enjoyed this article, please help spread it by clicking one of those sharing buttons below. And if you are interested in more, you should follow our Facebook page where we share more about creative, non-boring ways to teach English.