
We live in an age of fast-paced communication. Texting, e-mail and instant messaging often assault us from every side. Even so, the classic means of communicating, business letters, personal letters, etc. are still important for students to learn.
The following will take you step by step through the process of teaching these types of correspondence to your ESL students.
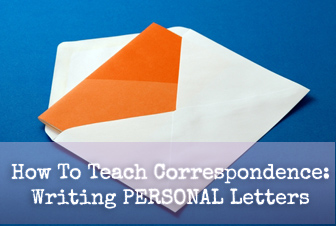
How to Teach Correspondence to Your ESL Students
-
Get Ready
If you, one of your students, or someone else you know has a stamp collection, bring it in for your students to examine. Stamps from around the world are interesting, and each student will be able to feel a part of a larger whole when seeing stamps from his home country. After viewing the stamp collection, encourage your students to bring in stamps they have at home from their native countries or from relatives around the world. You can have your own classroom stamp collection on a free bulletin board, and you can post a map of the world in the center with yarn connecting the stamps (posted around the outside of the map) to a pin on the country from which the stamps came. If you teach math as well as English, you can also have your students calculate, based on the map key, how many kilometers (or miles) the stamps have travelled to get to your classroom.
Now that you and your class have discussed how letters travel from one place to another, brainstorm a list of reasons someone might write a letter. The reasons will range from applying for a job to saying hi to a friend who has moved to supporting someone doing volunteer work in a foreign country. After your class has compiled a list, explain to them the difference between a personal letter and a business letter. Personal letters are friendly and are mainly for social reasons. Business letters, on the other hand, have purposes beyond friendly correspondence. Because they are business related, they must be more formal, shorter and more focused in content. With your class, determine which of the purposes they listed would be appropriate for a personal letter and which would be appropriate for a business letter.
-
2
Get the Pieces in Place
Now that your students are thinking about letters and why they might write them, it is time to look at the pieces that make up letters. You may want to have two samples that you can display at the front of the classroom during this discussion, or photocopy a personal and a business letter for each of your students to examine at their desks. While looking at the letters, make a list of the pieces necessary for each letter: return address, date, recipient address, greeting, message, closing and signature. Ask your students why each piece of the letter is necessary. What purpose does each serve? What would happen if you left out one of the pieces?
-
3
The Personal Letter
Start teaching correspondence with a personal letter. Your students, especially if you are teaching younger children, are probably more familiar with this type of letter. Remind them of the types of letters you would write in this style using the list you brainstormed earlier. After that, have them think of a person they might want to write a personal letter to. For this exercise, encourage your students that they do not have to write to someone who lives far away. They can write to someone as close as the same town. You will probably want to encourage them to write to a relative or friend, but you can also have them write to one another. If you choose this last option, you may want to mail all the letters yourself on the same day and have the students count the number of days it takes for the letters to come to their house. For the math teachers in the mix, this is the perfect opportunity to use a bar graph to summarize how soon the students in your class got each of their letters.
Once your students have decided who they will write their letters to, have them begin with the return address. They will hopefully know their own address and should start with that in the upper right hand of the paper. Below their address, they should put today’s date. On a personal letter, the next piece is the greeting. Most personal letters with start with “Dear (insert first name),” and it is important that your students remember the comma after the name of the recipient. They may then begin their message on the next line after indenting. Give your class time to write their greeting and then finish with the closing. The closing should be in line with the return address, that is on the right side of the page. Help your students compile a list of the closings they can use in a personal letter. They may include love, best wishes, and sincerely among others. They should include a comma after the greeting and then sign their name. Their personal letters are complete.
It is important when teaching younger children about letter writing to include addressing the envelope. Give them envelopes to use for their letters. You may want to avoid using business envelopes for personal letters to help your students further distinguish the two types of letters, but that will be up to you. Folding will be easier if you use business envelopes which are larger than personal envelopes. Whatever you decide, your students should put their return address in the upper left hand corner of the envelope. Unlike with the letter, they should start by putting their name first and then their address. The date does not go on the envelope. Stress to them that people often write their return address on the back of the envelope, but this is not the correct way to address an envelope. The address of the recipient will go in the center of the envelope: name and address. Stress to your students the difference between the recipient’s name on the letter and on the envelope. On the letter itself, they probably used the person’s first name only, but on the envelope they must use first and last name.
Give your students a stamp to put in the upper right corner of the envelope and they have successfully completed a personal letter.
Either have your students mail them (if they are to personal friends or relatives) or collect them and mail them yourself (if your students are writing to one another). Now your students are ready to move on to the business letter.
… to be continued.
P.S. If you enjoyed this article, please help spread it by clicking one of those sharing buttons below. And if you are interested in more, you should follow our Facebook page where we share more about creative, non-boring ways to teach English.